OneDrive: Add and View Shared Folders
How to Share Folders on OneDrive:
1. Log into Outlook using your myLSU credentials.
2. Click on the app launcher on the top left hand corner of Outlook. Then click on OneDrive.

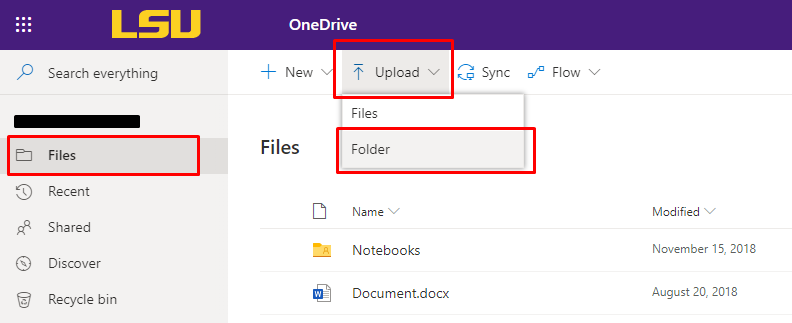
3. Click on the Files tab on the left hand side. Then click on the Upload button at the top tool bar and choose Folder.
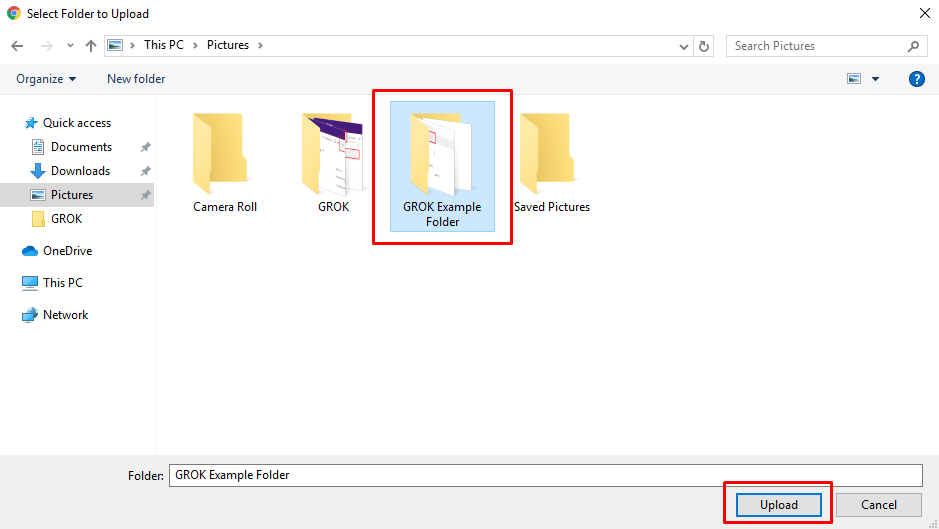
4. Locate and choose the file you wish to upload, then click Upload.
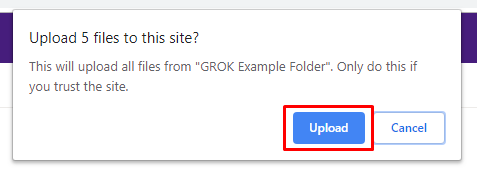
5. Click Upload if a popup message appears confirming if you want to upload the folder. After the file is finishing uploading, it will be under the Files tab.

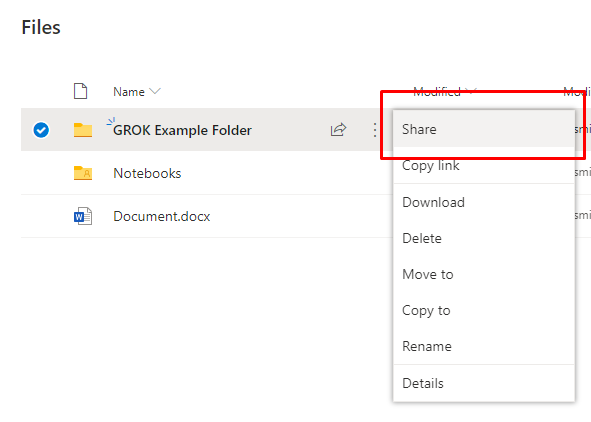
6. Toggle the mouse over the file, then click on the Show actions button (three vertical dots). Then click on the tab Share.

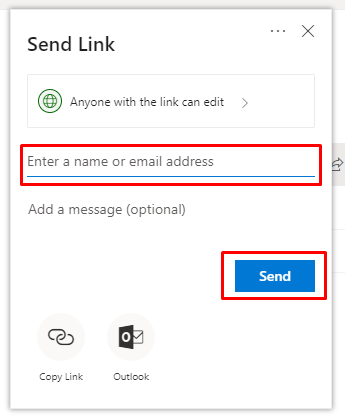
7. A pop up with the title Send Link should appear. Type in the email address of the user(s) you want to share the folder with, then click Send.
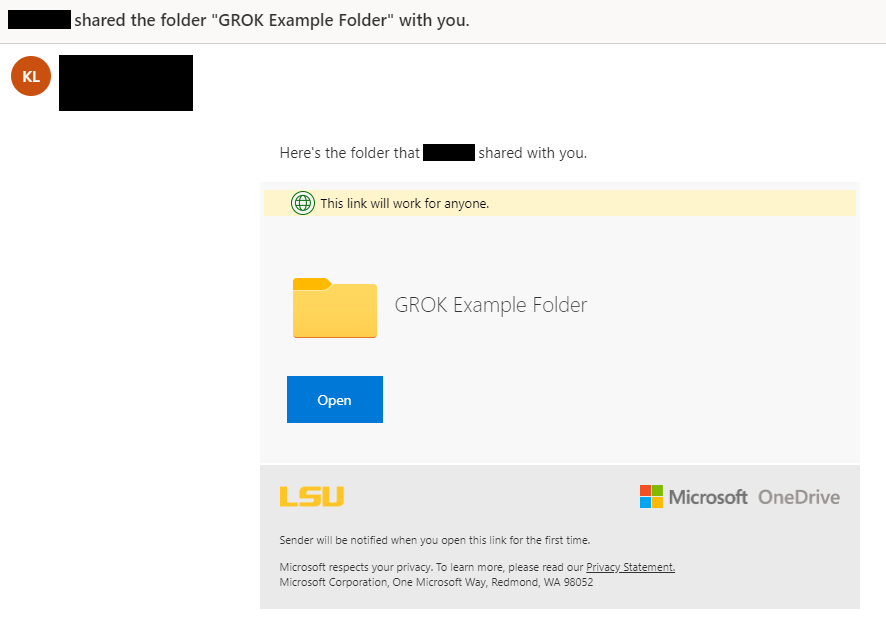
8. The user(s) should receive an email with a link to the specific folder to view.
How to View Shared Folders on OneDrive:
1. Log into Outlook using your myLSU credentials.
2. Confirm that you have access to the folder by checking your Outlook Mailbox for an invite.
3. Click on the app launcher on the top left hand corner of Outlook. Then click OneDrive.

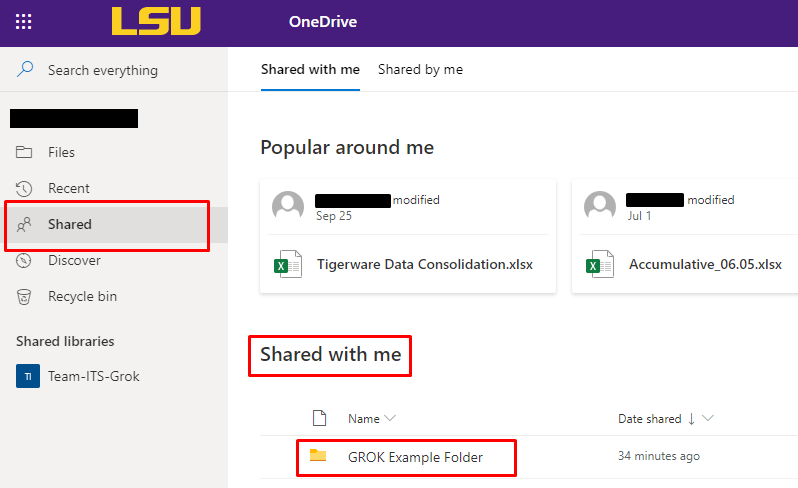
4. Click the Shared tab on the left hand side. The folder that is shared should be listed under Shared with me.
Referenced from: Microsoft
20018
9/16/2025 4:19:39 PM