UECM PXE Image Deployment
Imaging through System Center: PXE Booting
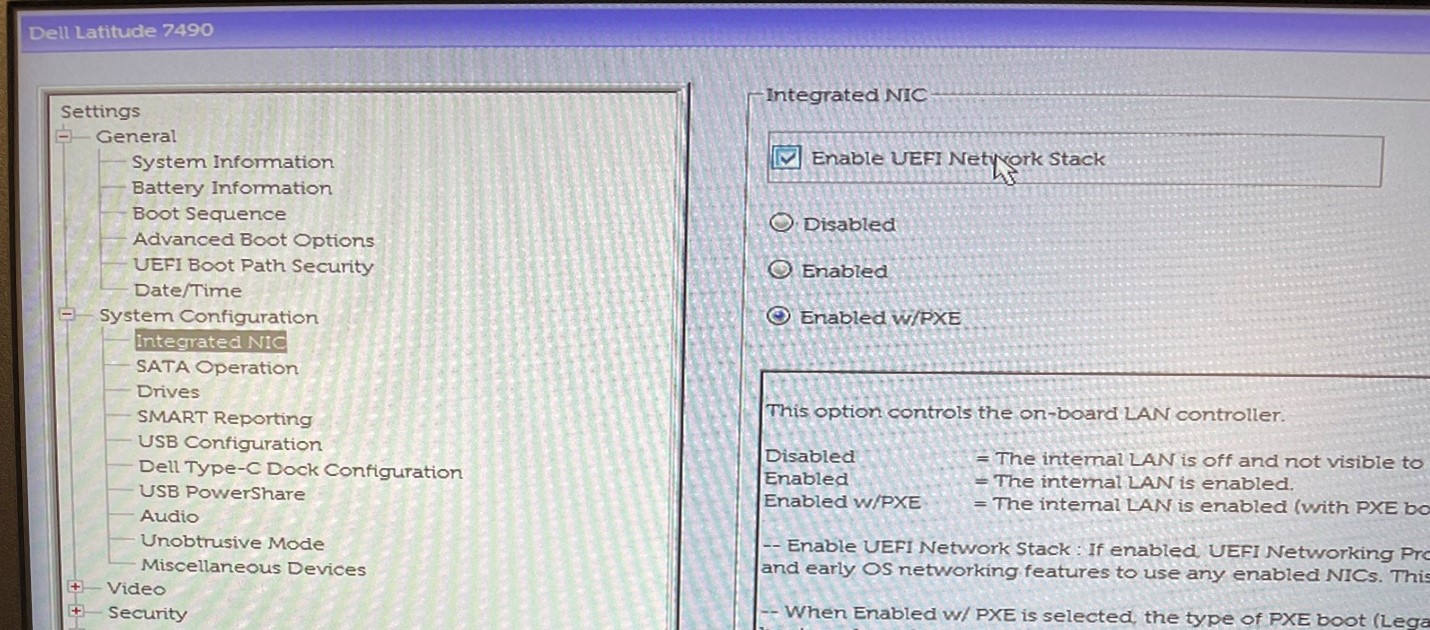
1. Before attempting to PXE boot, verify that network stack boot options are enabled in the BIOS. This may look different depending on the manufacturer and age of the machine. Picture below is the BIOS option for a Dell from the year 2019, where the setting is found under "System Configuration" -> "Integrated NIC" -> "Enable UEFI Network Stack" -> "Enabled w/ PXE"
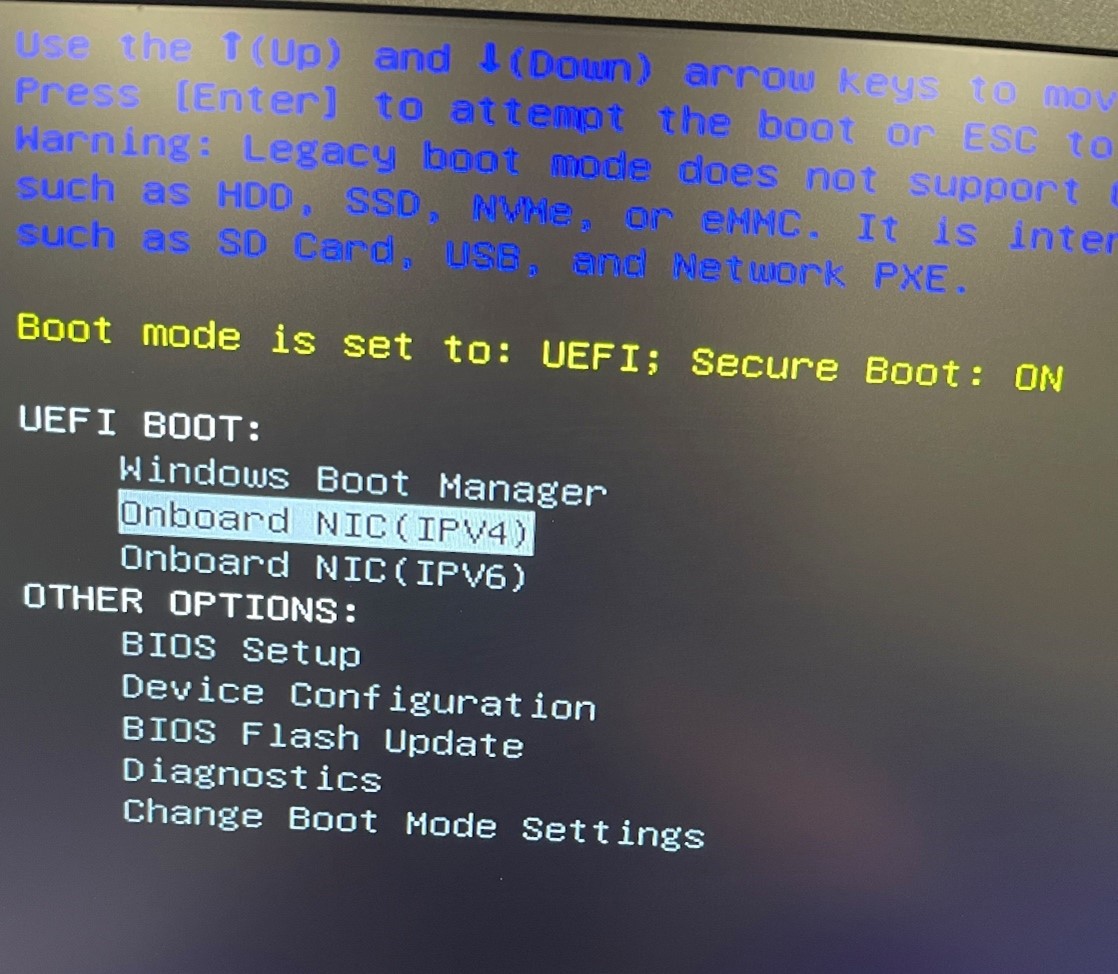
2. Once the network boot option is enabled, boot the machine to the boot options menu and choose PXE boot (IPV4).
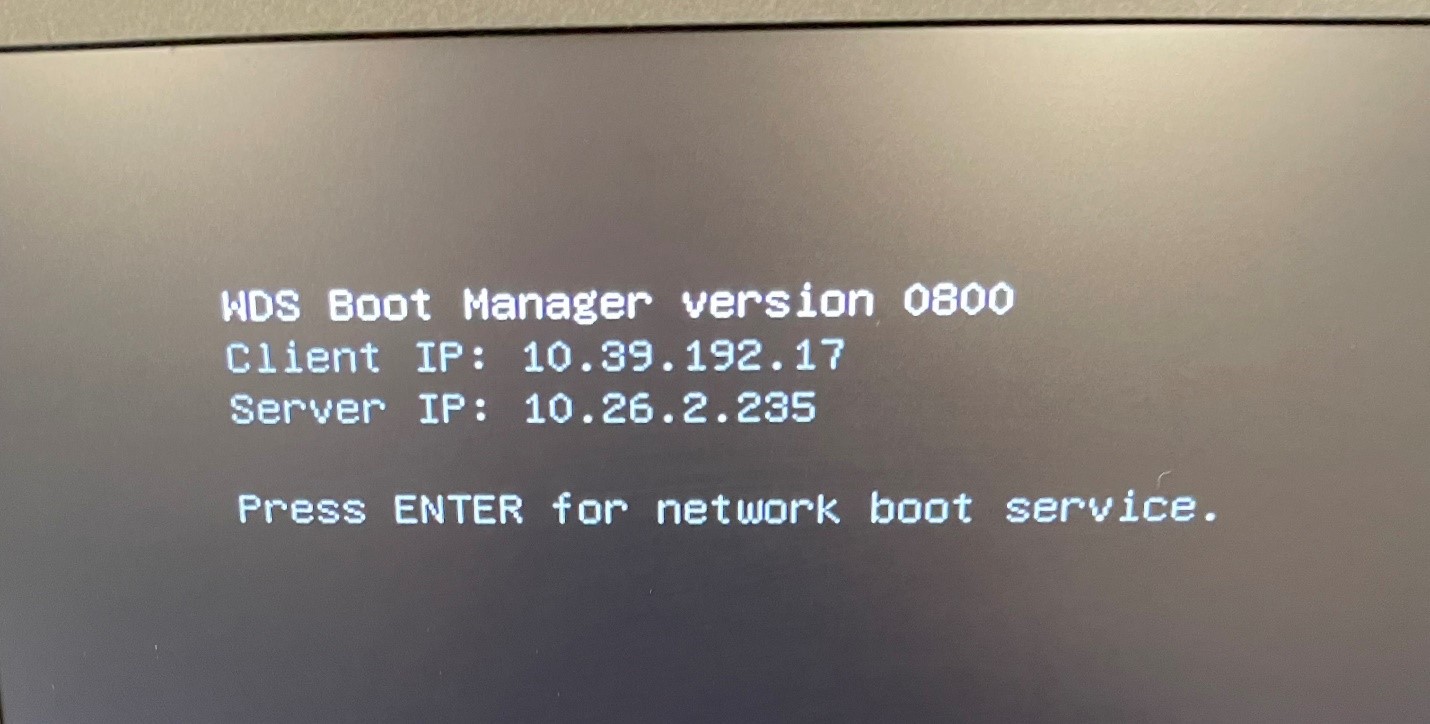
3. If the machine is successfully able to reach the PXE server through the network boot option, you should see the screen depicted below and press "enter" to select "WDS Boot Manager version 0800."
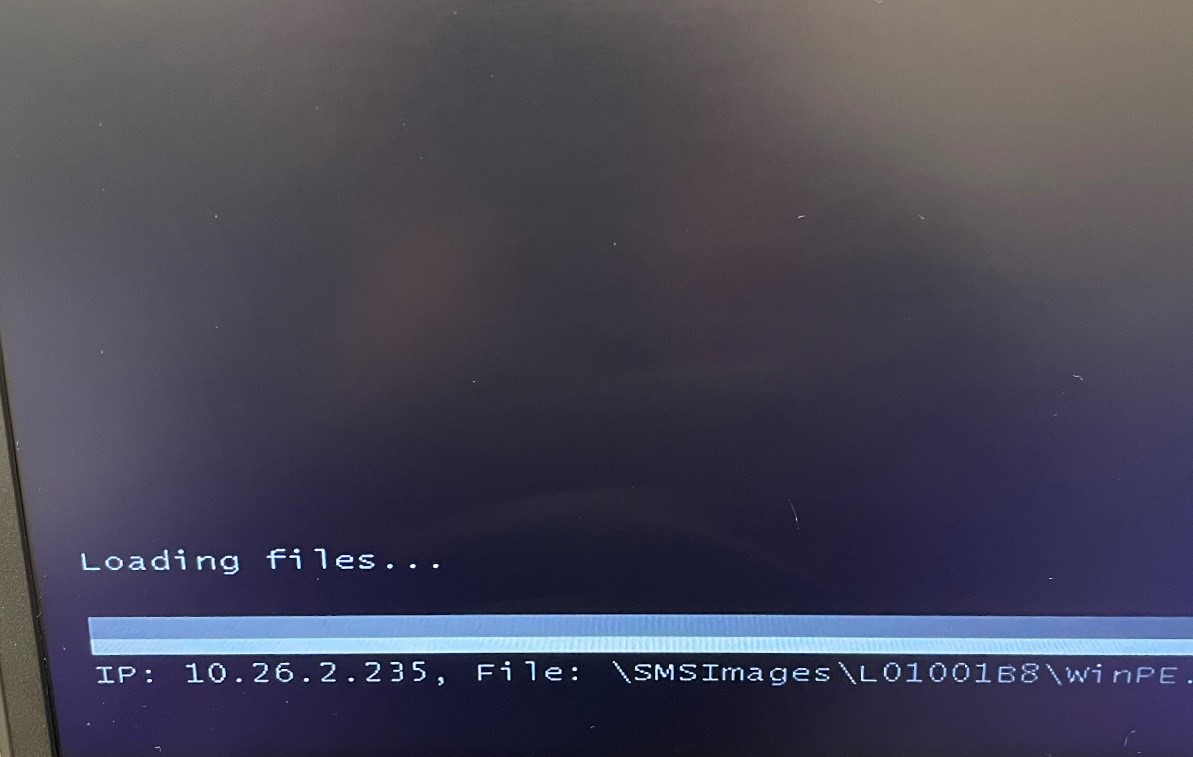
4. Next you will see the "loading files" screen, where no action is required.
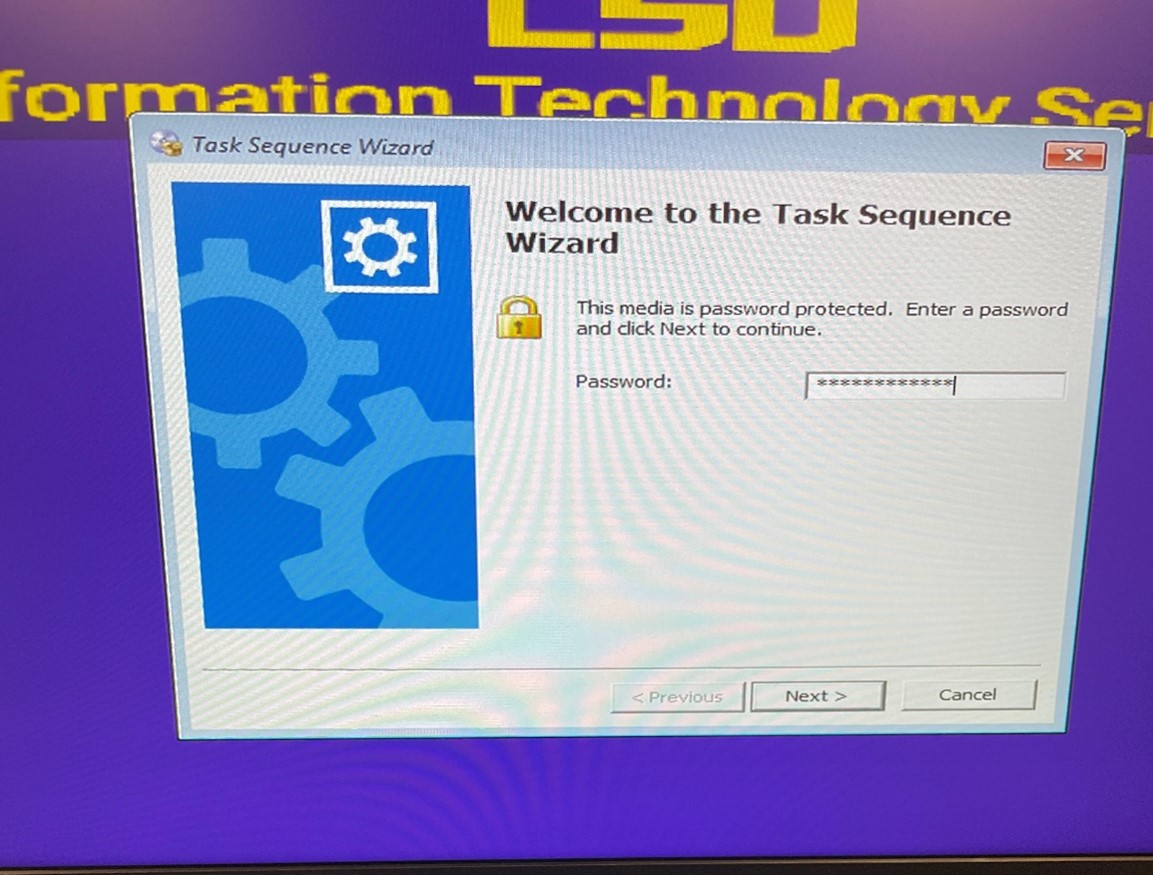
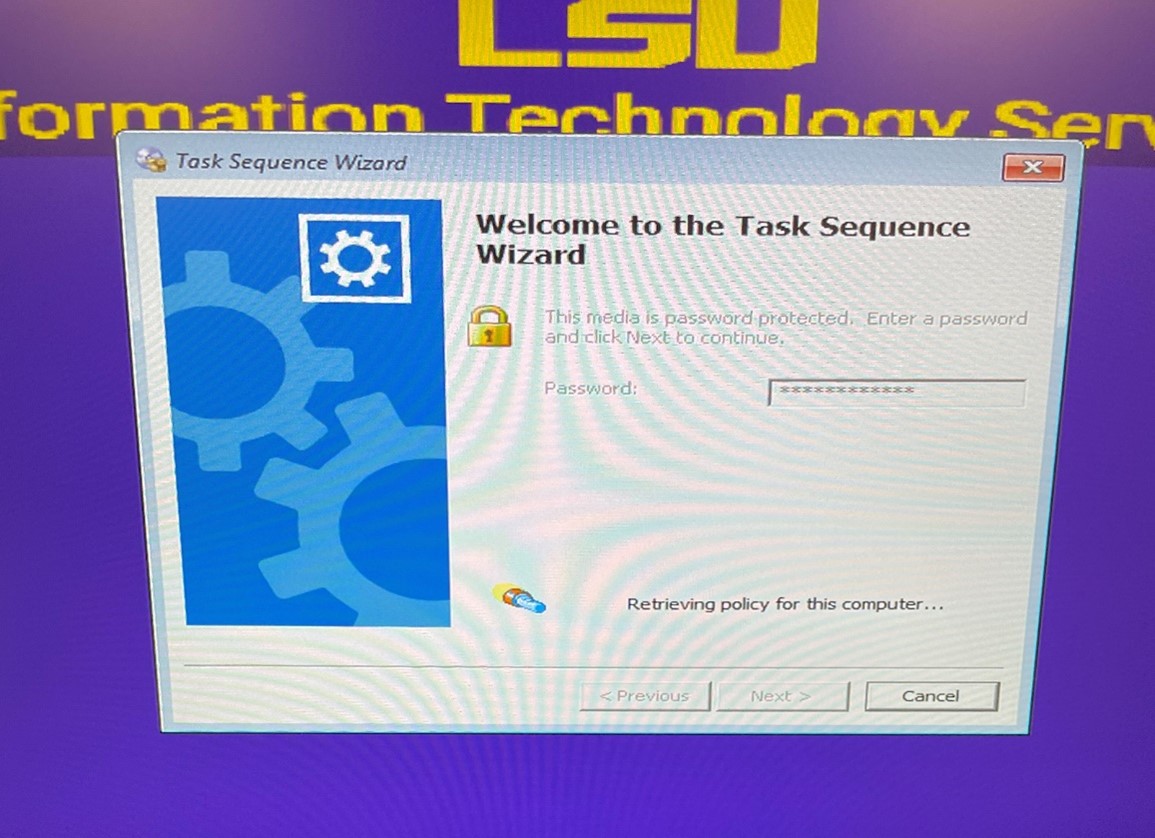
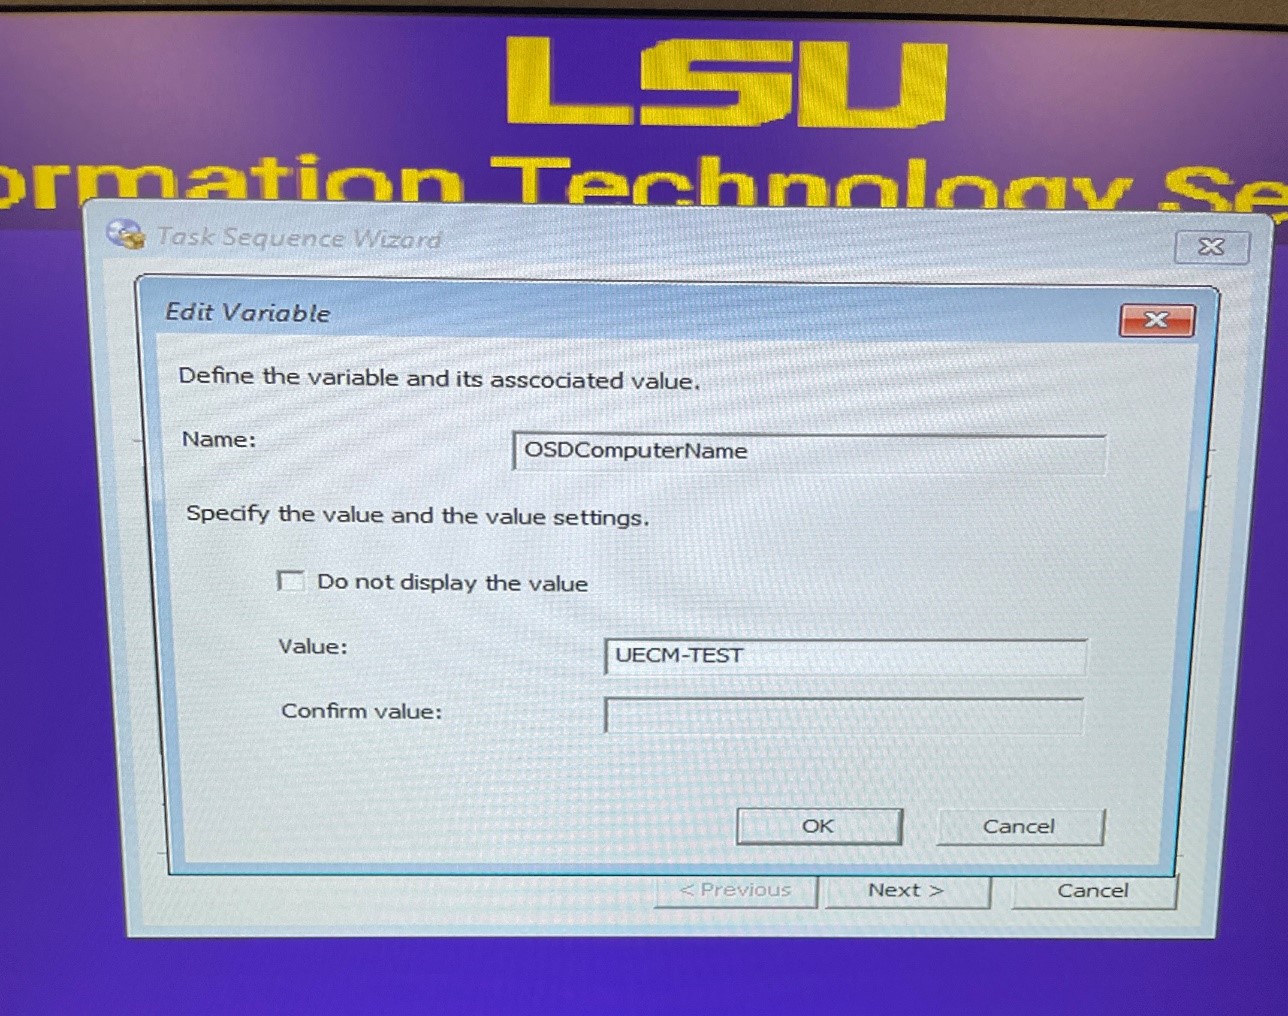
5. Next you will be brought to the Task Sequence Wizard where you will enter the media password and press "Next". Please email uecmhelp@lsu.edu for the password.
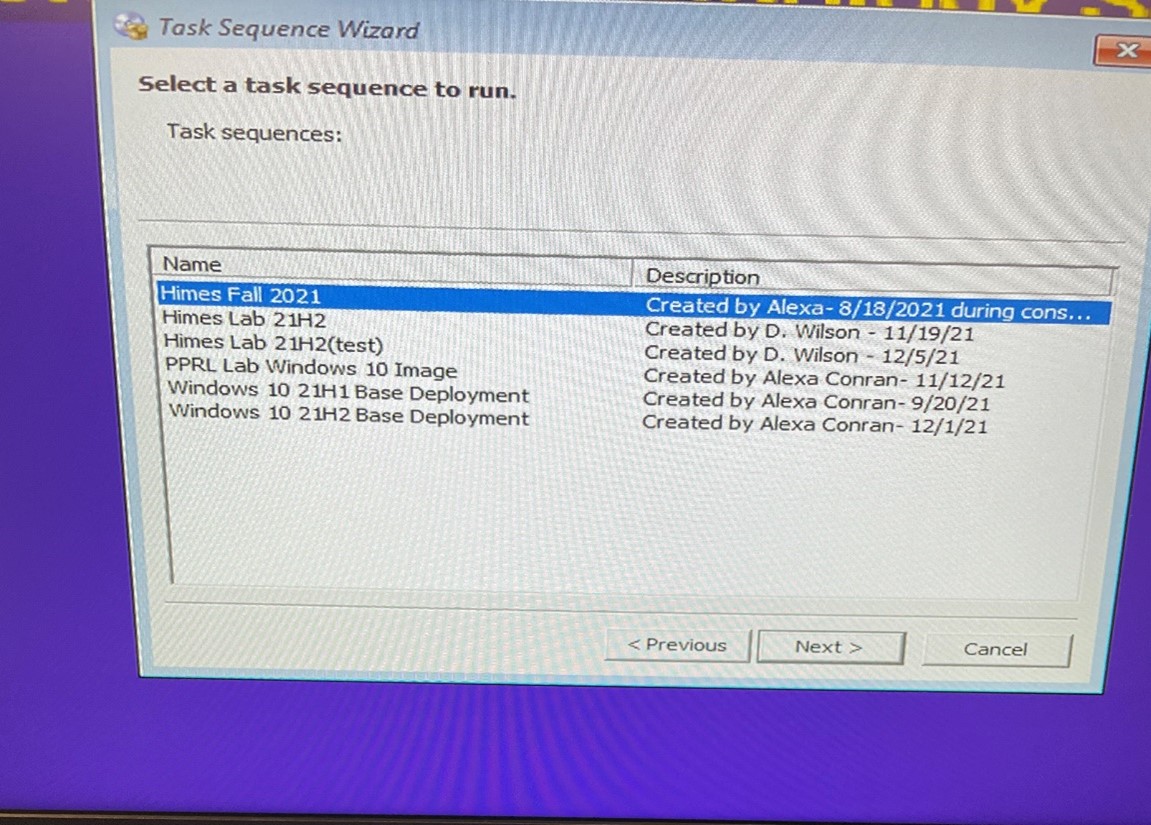
6. You will then be prompted to choose from a list of images that have been deployed to the computer you are imaging.
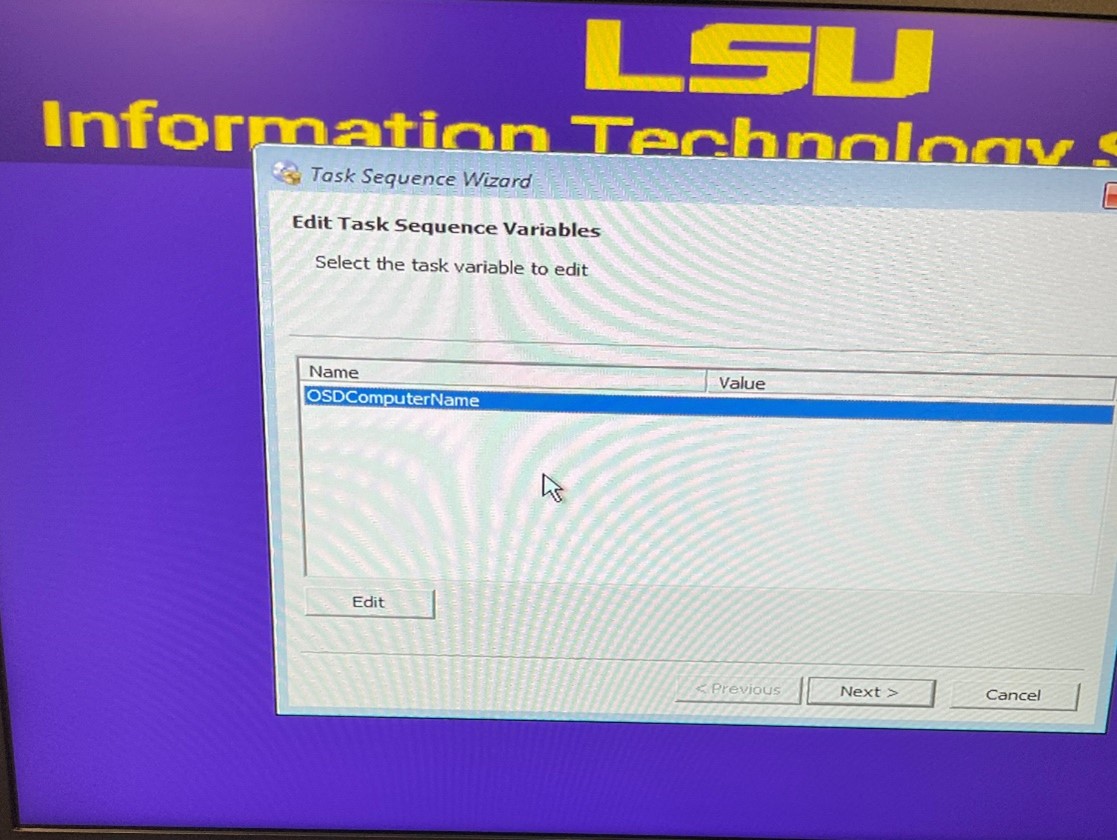
7. Next you be asked to set a name for the machine. Click the "edit" button and then enter the desired name. This will be the name that will be given to the object in Active Directory, no pre-staging of a computer object with this name is necessary before this, the task sequence will take care of the pre-staging.
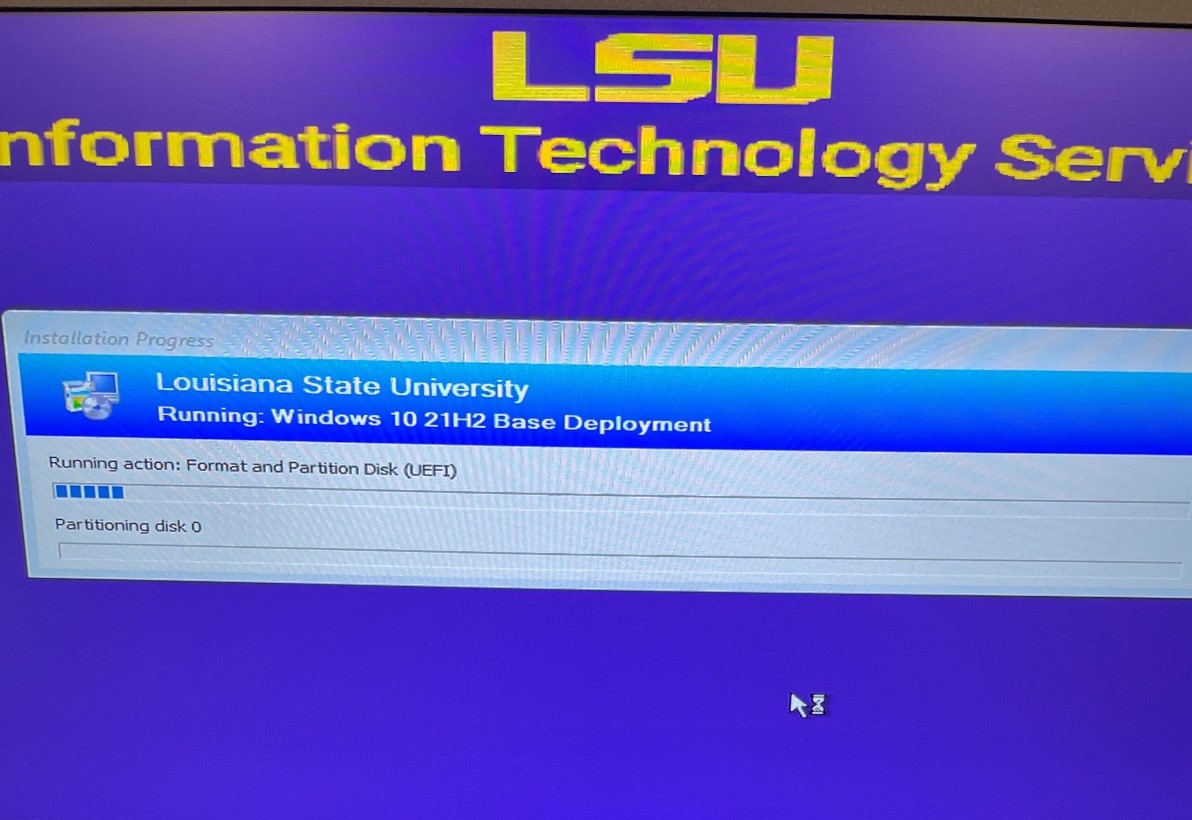
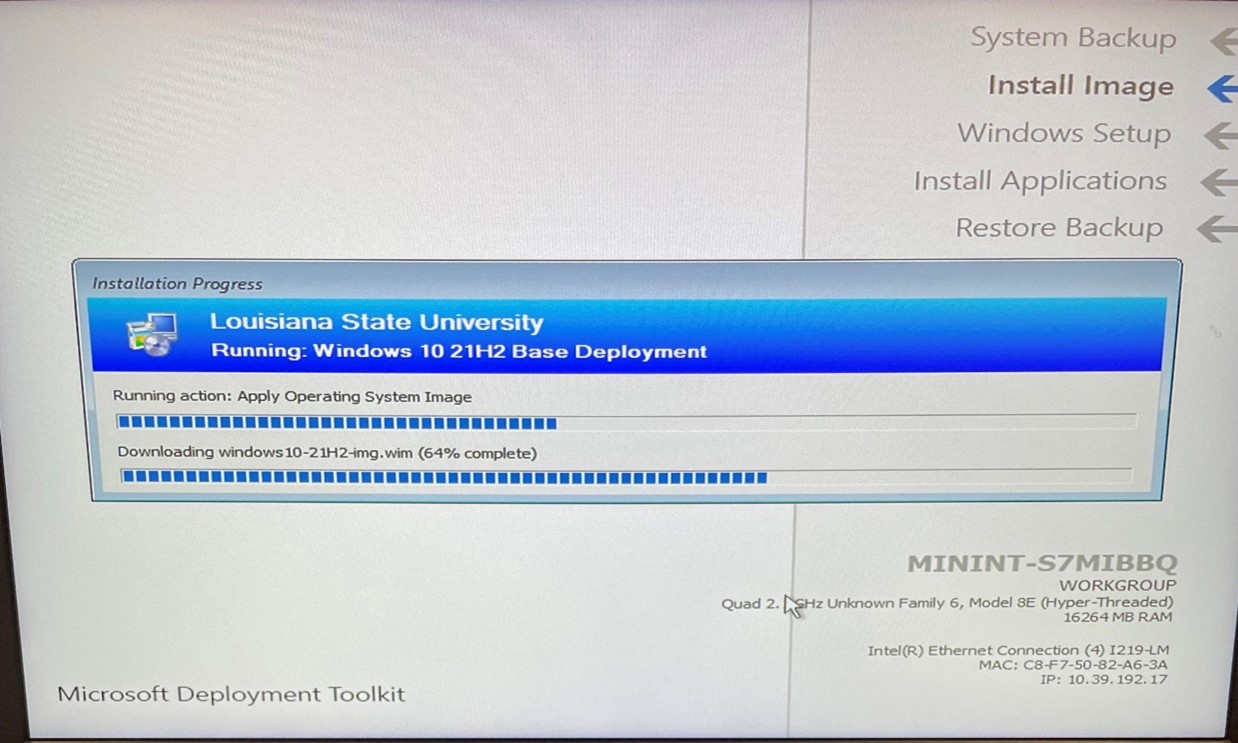
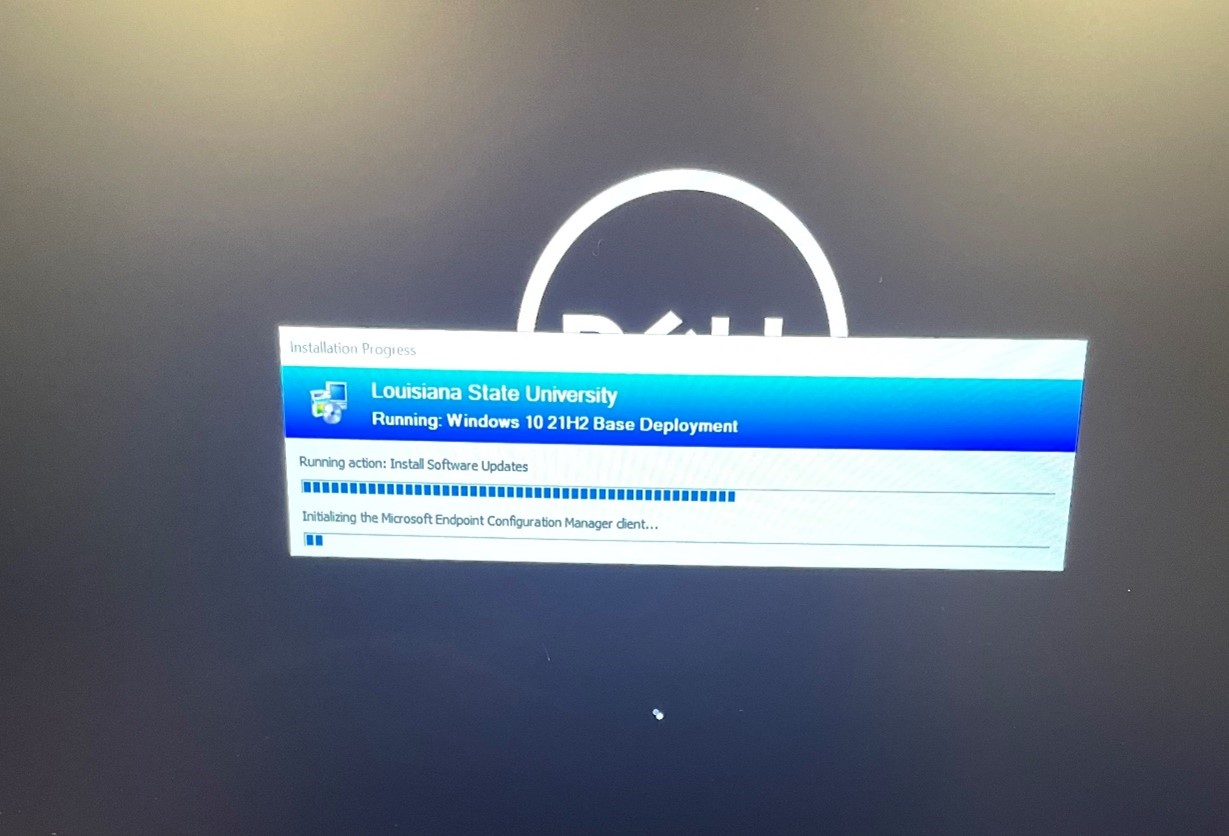
8. Press "OK" then "Next" and the image will be applied. The program will cycle through several different screens and reboot multiple times.
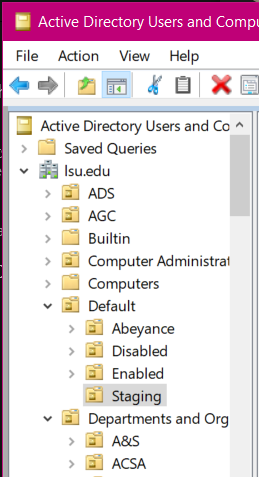
9. Once the image finishes applying, it should boot straight to the log-in screen with a domain log-in option. The AD object will appear under lsu.edu/Default/Staging/ where it can be moved to the appropriate OU and container in AD for each department, where administrative access can be granted through Group Policy.
System Center PXE Boot Notes and Troubleshooting
- In order to PXE boot, the machine in question must be connected to the LSU network in either with 130.39.xx.xx or 10.39.xx.xx ranges. Machines registered through BAM will be unable to PXE boot and the record must be removed from BAM before attempting to PXE boot.
- If the image you are trying to apply has not been deployed to a specific collection of machines, then it will be deployed only to devices that are unknown to SCCM. In this case, a UECM analyst must remove the device from SSCM before the PXE boot will be successful.
- If a USB or USB-C to ethernet dongle has been used to connect a machine previously, it may be seen as a "known device" in SCCM and therefore may not allow a successful PXE boot until it has been removed from SSCM.
- If using a thunderbolt to ethernet adapter, you may need to enable thunderbolt boot support in the BIOS.
- If a machine is already tied to the domain before you PXE boot, you will need to remove the object from Active Directory. You can use the same name, but it will be staged in the "Staging" OU and will need to be moved back to the correct container under your department's OU.
- Some newer Dell machines are shipped with RAID turned on in the BIOS. This can prevent the SSCM imaging client from seeing the hard drive during the imaging process, which may yield an error during the application of the image. It is best to have the storage set to AHCI.
- For any further troubleshooting assistance, please email uecmhelp@lsu.edu
20488
8/18/2025 1:37:28 PM